Edit Roles
Menu > System > Roles > Edit
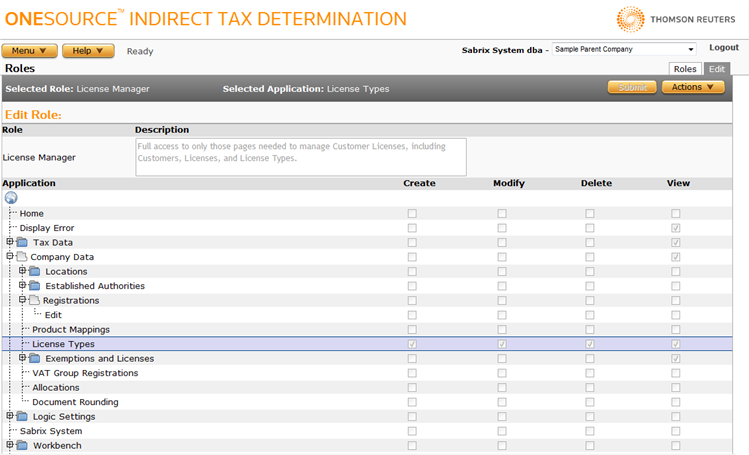
Use this page to manage access to all applications in Determination. The page initially displays either the permissions the selected or copied role has for each application, or a blank page with no permissions assigned (when creating a new role).
Only those users with the User Administrator role, such as the dba user, can manage roles. For all other users, this page is view-only or is not accessible.
From this page, you can:
- Add a new role.
- Copy or delete a role.
- Export a custom role.
-
Modify the particular permissions (Full, Create, Modify, Delete, View, None) associated with each application for the selected role.
You must Submit each change you make before collapsing or expanding an application list. Otherwise, any changes you make will be lost.
- Quickly copy attributes from parent applications to their children.
Manage roles
From the Roles page, you can add a role, delete a role, copy a role, or export a custom role.
Add a role
- Select Add from the Actions menu.
- Enter a name and description for the role.
- Click Submit to save your changes.
- Modify application permissions as shown in the procedures covering Full, Limited, None, and Copy to Children permissions below
- Click Submit.
Delete a role
You can delete the selected role. Note that only user-defined and copied roles can be deleted.
- Select Delete from the Actions menu.
- Click OK to confirm the deletion.
Copy the selected role
- Select Copy from the Actions menu.
- Enter a new name and click OK.
- Modify application permissions as shown in the procedures covering Full, Limited, None, and Copy to Children permissions below.
- Click Submit.
Export a role
You can export the selected custom role, or all custom Determination roles.
- Select Role Properties from the Actions menu.
- Click one of the following:
- This Role to export only the selected custom role.
- This Role and All Siblings to export all custom Determination roles.
- Click Save.
- Browse to or enter a filename to save to and click Save.
Once you save the file, you can re-import it. See the Importing Data page.
Manage access to an application
From the Roles page, you can provide Full access, Limited access, or No access to an application. You can also copy attributes from an application's parents to its children.
Provide full access to an application
- Click on an application to select it.
- Select Full from the Actions menu.
- Click Submit to save your changes.
Provide limited access to an application
- Click on an application to select it.
- Click the desired checkboxes for the application. Available modes are:
- Create: Ability to add items.
- Modify: Ability to submit changes.
- Delete
- View: If not selected, a user with this role will not see the application in the menu.
- Click Submit to save each change before collapsing or expanding an application list. Otherwise, any changes will be lost.
- Click Submit to save your changes.
If View access is not provided for an application, the application's children cannot be accessed.
Provide no access to an application
- Click on an application to select it.
- Select None from the Actions menu.
- Click Submit to save your changes.
If View access is not provided for an application, the application's children cannot be accessed.
Copy attributes from an application's parents to its children
Determination passes down the roles to the application's children.
- Configure the application's settings as desired, using the procedures shown above.
- Select Copy to Children from the Actions menu.
- Click Submit to save your changes.
In some cases, not all settings are passed down directly. For example, a Create attribute will only be passed to children for whom item creation is a possibility.